
What is ghost mannequin photography?
Ghost mannequin, also called invisible mannequin or hollow mannequin, is a way to photograph clothing as if an invisible body were wearing it. The garment has volume, shoulders, and a natural drape, but you do not see a mannequin, hanger, or model.
The effect is created in post-production. You photograph the garment on a mannequin, remove the mannequin, and fill the opening at the neck, and sometimes the sleeves, with a separate shot of the inside. This shows the lining, the inner label, and the back of the collar, just like on a garment being worn.
The result is called a ghost packshot. It is widely used on product detail pages, or PDPs, and is often the standard for jackets, blazers, shirts, sweaters, and dresses on marketplaces and large webshops.
Why do online stores choose a hollow mannequin?
A flat lay, where you lay a garment flat, is fast but shows little of the fit. A model photo shows the fit best, but it is expensive and draws attention to the model. A ghost mannequin sits between the two: you see the shape and cut, while all attention stays on the product.
It also works well for consistency. Every blazer or sweater appears at the same height, with the same shoulder width and the same crop, giving your category page a calm, professional look. Ghost packshots are also a good source for AI model photos, because shape and details are clearly visible.
| Method | Fit visible | Work by item | Suitable for |
|---|---|---|---|
| Flat lay | Low | Low | T-shirts, children's clothing, accessories |
| On hanger | Fair | Low | Fast intake, secondhand |
| Ghost mannequin | Good | Medium, with post-processing | Coats, blazers, shirts, sweaters, dresses |
| On-model | Very good | High | Hero images, campaigns, fit-critical items |
How to shoot a ghost mannequin
You need a mannequin, preferably one with removable parts or a removable chest piece, so you can work easily around the neck and shoulders. A neutral, solid color such as white or light gray makes retouching easier.
Dress the mannequin neatly, fasten the garment the way you want it shown, and smooth out creases with a steamer. Place the mannequin straight in front of the camera, with the camera at chest height, so the shoulders are level. Shoot the front, then turn the mannequin for the back and, if needed, the side.
Keep the lighting, distance, and camera position the same for every product. The more consistent the shots are, the easier the post-processing and the calmer the result looks in your online store.
- Mannequin in a neutral color, preferably with a removable neck or chest piece
- Camera on a tripod at chest height, always in the same position
- Soft, even light from both sides to prevent harsh shadows
- Garment steamed and buttoned, labels and loose threads removed
- For each view, the shot on the mannequin plus a separate shot of the inside neck
The separate inside-neck shot
If you only remove the mannequin, you see an empty hole at the neck, or the back of the garment without the inside. That is why you take a second shot: the inner-neck shot. Turn the garment inside out or lay it with the back facing forward, so the inside of the collar, the lining, and the inner label are visible.
In post-processing, that inside section is placed into the neck opening. This makes it look as if you are looking inside the garment. Traditionally, this requires precise masking and warping in photo-editing software, which is why retouchers charge more for ghost mannequin than for a regular cut-out image.
Shoot the inside neck with the same lighting and from the same height as the main shot. This keeps the color and perspective aligned and makes the seam between the two shots unnoticeable.
No time for a second shot? You can also use one source image; it will become a clean ghost packshot with no visible inside.
How much does ghost mannequin photography cost?
At a packshot studio, a ghost mannequin image typically costs €12 to €30 per image, including photography and removing the mannequin. If you supply the photos yourself and only outsource the post-processing, it typically costs between €3 and €10 per image, depending on complexity.
Automatic editing removes that retouching cost. In Photopilot, mannequin removal is automated, along with the background, crop, shadow, and color correction. You pay at most €0.05 – €0.21 per image on top of the monthly plan starting at €500 per month, with no retoucher needed.
| Route | Typical per image | Lead time |
|---|---|---|
| Fully outsourced | €12 – €30 | Days to weeks |
| Shoot yourself, outsource retouching | €3 – €10 | A few days |
| Shoot yourself, retouch yourself | 10 – 20 minutes of work | Depends on capacity |
| Shoot yourself, Photopilot | No more than €0.05 – €0.21 | Immediately after capture |
How Photopilot automatically removes the mannequin
Photopilot recognizes the garment's silhouette, removes the mannequin, and preserves the fit and folds as the garment falls. If you have taken a separate shot of the lining and inside label, it is automatically combined into the final result, so the packshot looks like a realistic hanging garment.
After that, the same rules apply as for all your other images: background, crop based on your template, shadow, and color. If you shoot in Photopilot Studio or with the iPhone app, the photo is immediately linked to the right item and the right image slot, without exporting or renaming.
You see each result next to the source photo. Per brand or collection, you choose whether it can go live automatically or should go through a quick review first, and then it is sent to your webshop.
Back, details, and common mistakes
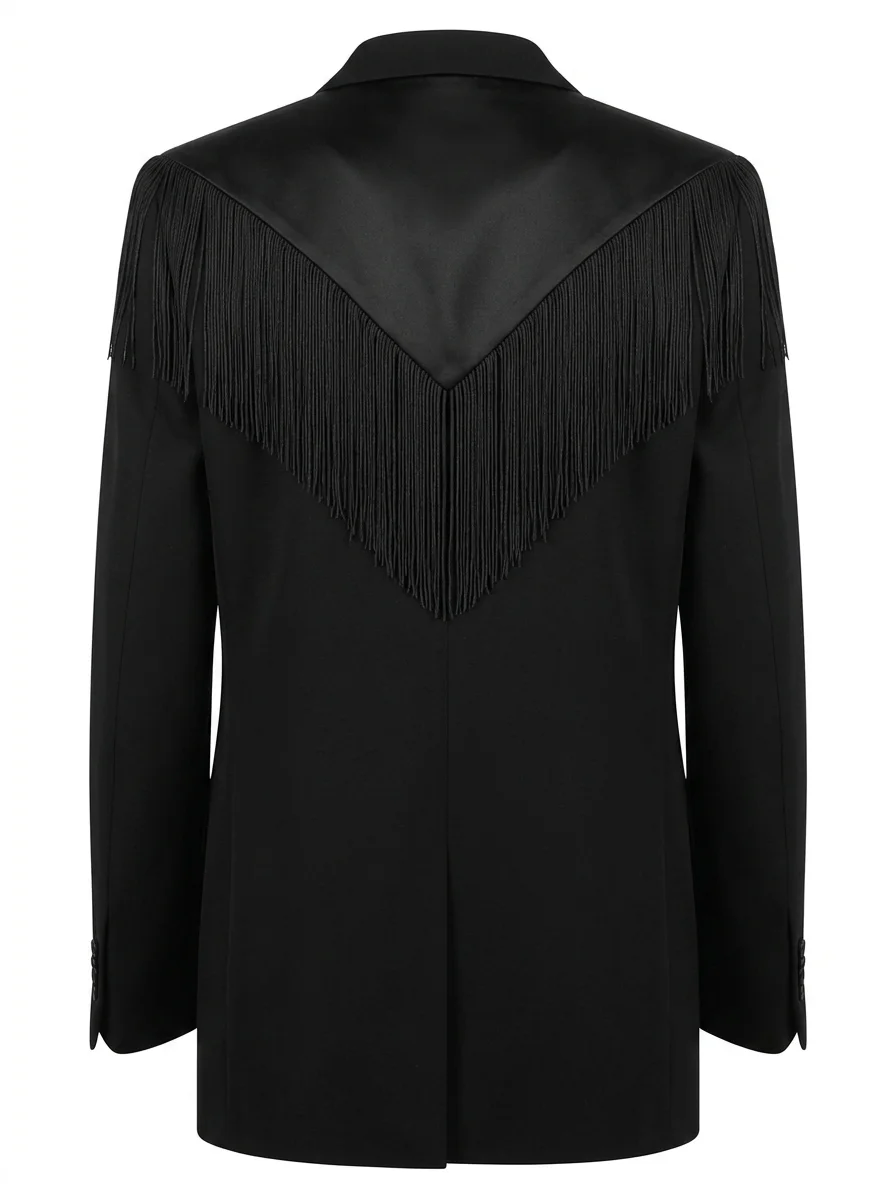
Do not forget the back. With coats and blazers, that is often where the key detail is: a vent, a pleat, or, as with the black blazer below, fringe. Photograph the back on the same mannequin and with the same lighting, so the front and back shots match on the product page.
Common mistakes include a crooked mannequin, a garment that is too large or too small for the mannequin, visible pins and clips, and inconsistent lighting between items. Software can correct a lot, but a garment that fits poorly on the mannequin will still fit poorly.
Do not use ghost mannequin for everything. For soft, shapeless items such as scarves or swimwear, a flat lay or model image often works better, and for fit-critical items you will want an on-model photo in addition to the ghost packshot. For clothing without a true neck opening, such as a skirt or pants, you do not need a neck shot.